Free
Shipping


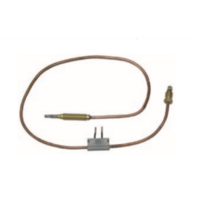
The Braemar THM 520 & THM 520X are ducted gas heaters, and the PCB Circuit Control Board (Modulating Control Board, MCB) with Part Number: 640365 is a key component in these systems. It controls various functions of the heater, including the ignition process, fan modulation, and temperature regulation, ensuring that the unit operates safely and efficiently.
Here’s a more detailed look at the PCB Modulating Control Board (PN: 640365) and its role in the Braemar THM 520 & X Gas Ducted Heaters:
The PCB Modulating Control Board is designed to manage several critical operations in the Braemar THM 520 & THM 520X NG ducted heaters, such as:
Ignition Process:
The PCB controls the ignition process, triggering the spark igniter to light the burner when the system is powered on.
Modulation of Fan Speed:
The MCB adjusts the speed of the fan based on the temperature requirements. By modulating the fan speed, the system ensures that the air is distributed efficiently and that energy use is optimized.
Temperature Control:
It works in conjunction with the thermostat to maintain a consistent room temperature by adjusting the burner and fan speed.
Safety Features:
The board is equipped with safety mechanisms to monitor flame detection and pressure switches to ensure safe operation. If a malfunction or unsafe condition is detected (e.g., failure to detect flame or ignition problems), the system will shut down to prevent any hazardous situation.
Error Codes:
Many PCB systems, including the 640365, feature diagnostic capabilities. If the system encounters an issue, such as a failure to ignite or a sensor malfunction, it will often display an error code that helps with troubleshooting.
If you're replacing the PCB Circuit Control Board in the Braemar THM 520 & THM 520X NG Ducted Heater, follow these steps:
Screwdrivers (Phillips and flathead)
Multimeter (to check electrical connections)
Replacement PCB (Part Number: 640365)
Labels or camera (for marking wire connections)
Turn Off Gas and Power:
Before working on the system, turn off both the power and gas supply to the heater to ensure safety.
Remove the Access Panel:
Using a screwdriver, remove the panel that covers the internal components of the heater, giving you access to the PCB.
Locate the Existing PCB:
The PCB is typically located near the burner assembly or in a dedicated section of the unit. It may be secured with screws or clips.
Disconnect Wiring from the PCB:
Take a photo or label each wire to ensure proper reinstallation.
Carefully disconnect the wires from the old PCB, noting which wire goes where.
Remove the Old PCB:
Unscrew or unclip the PCB from its mounting points and gently remove it from the unit.
Install the New PCB (PN: 640365):
Mount the new PCB in place, ensuring it’s securely fixed to the mounting points.
Reconnect all wiring to the new PCB, ensuring the connections are secure and match the configuration of the old board.
Double-Check Connections:
Ensure that all wires are correctly reconnected, especially the critical components like the flame sensor, ignition system, and fan motor connections.
Reassemble the Heater:
Once the new PCB is installed and all connections are made, replace the access panel and secure it with screws.
Turn On Gas and Power:
Turn the power and gas supply back on, then test the heater.
The heater should attempt to ignite, and you should hear the fan start running at the appropriate speed.
Verify System Operation:
Check that the heater is working properly. Ensure that the fan is modulating according to the temperature setting and that the heater is heating effectively.
If the system displays any error codes or malfunctions, check the diagnostic codes and troubleshoot as needed.
If your heater is still not functioning correctly after replacing the PCB, here are a few troubleshooting steps:
Possible Causes:
Incorrect wiring to the PCB.
Faulty spark igniter.
Flame sensor failure.
Solution:
Double-check the wiring and connections on the new PCB.
Test the spark igniter to ensure it’s generating a spark.
Inspect and clean the flame sensor to ensure it’s detecting the flame properly.
Possible Causes:
Error codes indicate specific problems, like flame detection failure, ignition failure, or fan issues.
Solution:
Refer to the user manual for your model to decode any error codes and troubleshoot accordingly.
Possible Causes:
A faulty fan motor or PCB not modulating the fan speed properly.
Solution:
Ensure that the fan speed control connections are securely connected to the PCB.
Test the fan motor to ensure it’s operating correctly.
Possible Causes:
Incorrect sensor readings or issues with the modulating control.
Solution:
Check the temperature sensors and ensure they are functioning properly.
Verify that the fan is modulating based on the heating demand.
To ensure that your Braemar THM 520 & THM 520X ducted heater continues to work efficiently:
Regularly clean the flame sensors and burner assembly to remove any soot or debris that could affect performance.
Check the fan periodically to ensure it’s operating smoothly and that no dust or debris is causing strain on the motor.
Inspect the PCB for any signs of wear or corrosion, especially around the connections.
| SKU | 19941 |
| Brand | Braemar |

Add your favourites to cart

Select Afterpay at checkout

Log into or create your Afterpay account, with instant approval decision

Your purchase will be split into 4 payments, payable every 2 weeks
All you need to apply is to have a debit or credit card, to be over 18 years of age, and to be a resident of country offering Afterpay
Late fees and additional eligibility criteria apply. The first payment may be due at the time of purchase
For complete terms visit afterpay.com/terms